Kimchi Fried Rice (VG, GF)

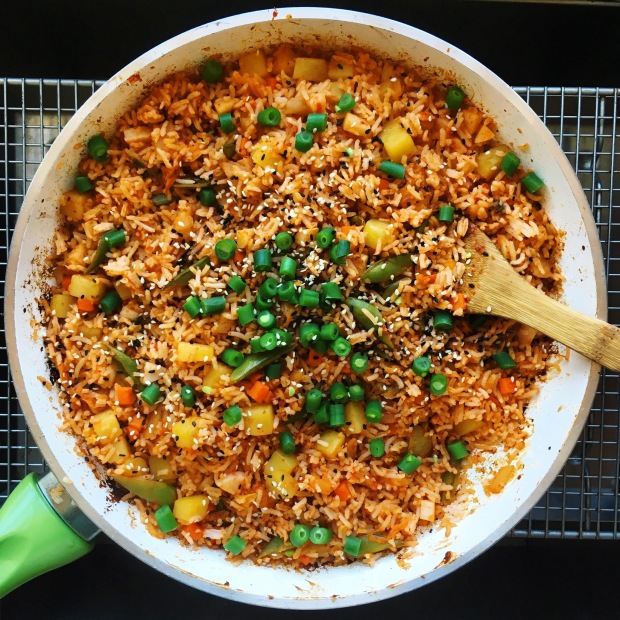
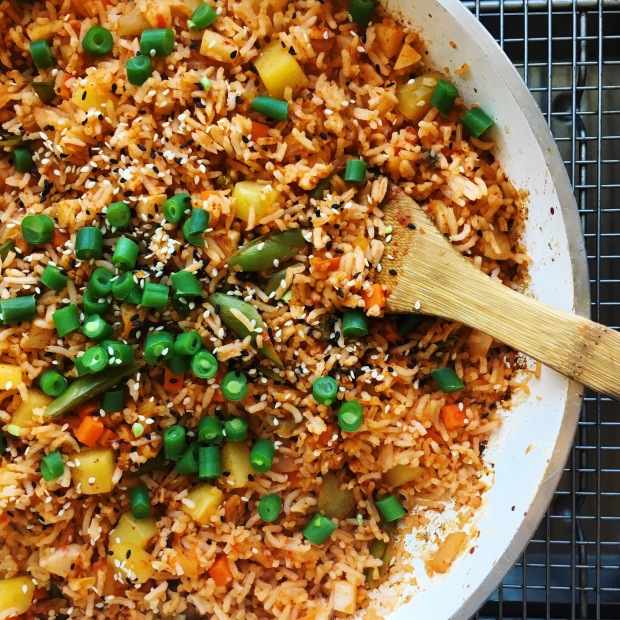
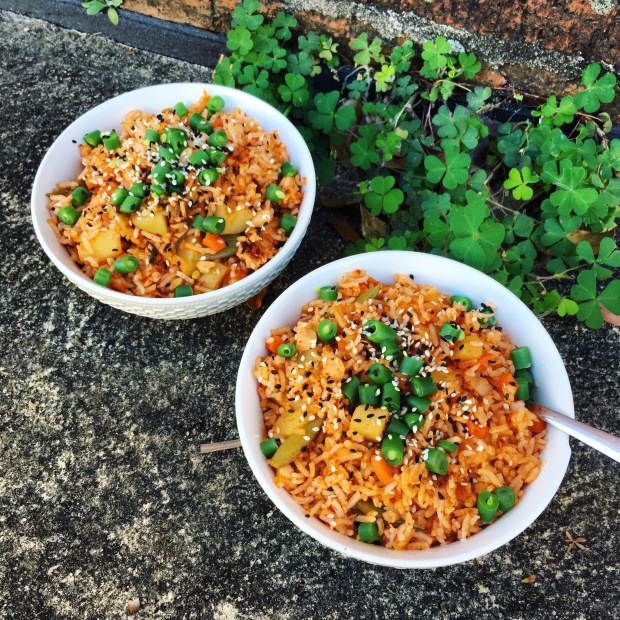
Fluffy rice, spicy & tangy kimchi, creamy potato & crunchy veg.  ❤️  ❤️  ❤️

Vegan, gluten free, allium free and oil free.

The rice will soak up all the flavours of the kimchi juice. So if you LOVE the spiciness and tanginess of kimchi, this is a recipe for you!

I used homemade vegan kimchi for this dish. I always prefer to make my own as it’s cheaper + I can make it to my own tastebud’s liking.

But if you don’t have the ingredients or time to make your own vegan kimchi, feel free to buy it! Just make sure it doesn’t contain any animal products – please watch out for fish sauce and minced shrimp!

Fried rice is actually one of the first dishes I ever learnt to make at school (we had Food Tech/Hospitality classes in Year 7). Rice + veggies + soy sauce + salt = ultra basic fried rice. You can’t really stuff up fried rice (unless you overcook the rice in the first place I guess ahahaha). If 12 year old can do it, you can too!

For rice, you can use leftover rice or freshwhite or brown – As long as it isn’t too overcooked or under. ‘Crunchy’ or ‘stodgy’ rice is very unpleasant. You want fluffy and tender defined grains of rice.

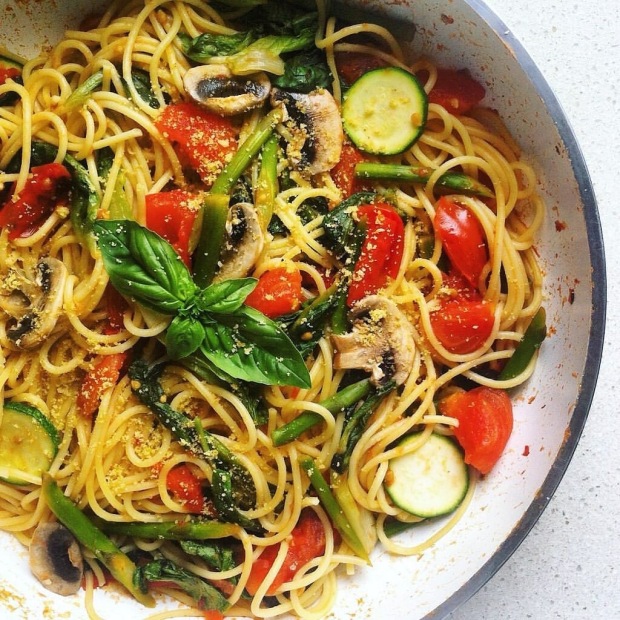
You can use whatever vegetables you want/have in your fridge/can afford. My favourites include potato, carrot, capsicum, green beans, broccoli and chinese cabbage. But I’ve even used frozen mixed veg before!

Kimchi fried rice is also absolutely perf for this chilly weather. But whatever season you have fried rice, it’s always soooo satisying steeeeeaming hot!

IMG_0127IMG_0129IMG_0128IMG_0130Simplicity: 3.5/5     Deliciousness: 3.5/5     Nutrition: 3/5

Serves 3 – 4

Ingredients

  • 1 cup of rice (I like to use basmati)
  • 1 cup of vegan kimchi
  • 1/3 cup kimchi juice
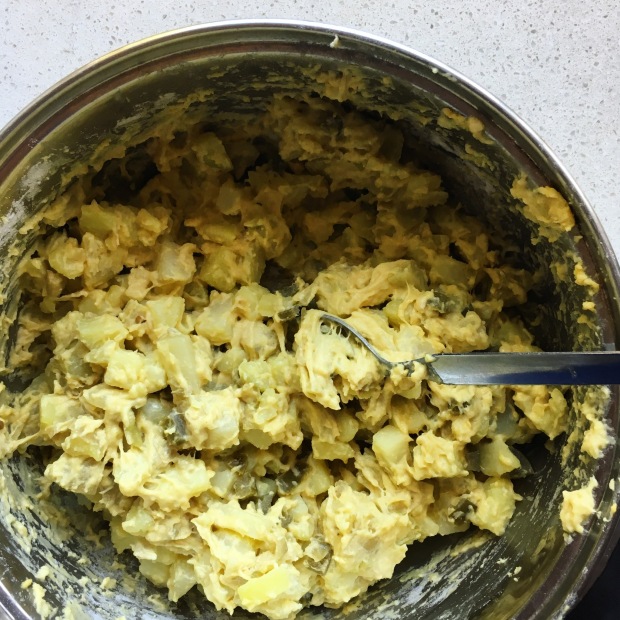
  • 1 cup diced potato
  • 3/4 cup diced carrot
  • 3/4 cup sliced pea pods
  • 10 green beans (at least – you can obviously have more)
  • 1 ½ tbsp tamari
  • Himalayan pink salt
  • sesame seeds

Method

  1. Cook the rice. Use whatever method you are most familiar with – rice cooker or stove top. Once cooked, use a rice paddle to break up the rice.
  2. Dice the green beans. Boil water in your frying pan. Place the green beans in and cook until tender (approx. 2 minutes). Remove with a slotted spoon into a bowl. Set aside.
  3. In the same frying pan full of boiling water, place the diced potato in. Cook on high heat until just cooked through/tender (approx. 8-10 minutes). Drain.
  4. Wipe dry your frying pan. Place it back on the stove and heat it up again. Add the diced carrot and kimchi. Stir fry on medium-high heat for approximately 3 minutes – stirring occasionally. Then add the sliced pea pods and cook for 1 minute.
  5. Add the potato and rice to the pan. Carefully stir fry to ensure all the ingredients are evenly distributed. Add the kimchi juice all over the rice.
  6. Add the tamari and stir.
  7. Season with salt to taste.
  8. Turn off the heat. Serve with green beans and sesame.
  9. ENJOY!!


Potato & Jalapeño Waffles (VG, GF)

Piping hot, fluffy insides, crispy outside, noochy & savoury with spicy & tangy jalapeño bits…

I know I just said a bunch of adjectives hahaha. Just know that it’s DEEELICIOUS!

I’m absolutely addicted to these! They’re basically hash browns but wafflelised & spicy!

There is no saturated fat or oil used in the waffles themselves. The only oil used is unrefined coconut oil – and that’s for greasing the waffle iron.

The cooking device? I used a non-stick Belgian Waffle maker (Mine is a Cuisinart 4 Slice Belgium Waffle Maker). The deep pockets are perfect for potato waffles that are chunky/have texture!

To adjust the spiciness level, I would suggest using:

zero: 1 cup frozen peas (add these to the boiling potatoes 2 mins before they are cooked)

mild: 8 pickled jalapeños

spicy: 12 pickled jalapeños

extra spicy: 15 pickled jalapeños + 1/2 tbsp pickled jalapeño juice (I love spicy foods so this is the level the recipe is at.)

Toppings and sauce are optional but highly recommended; they will bring some variation of flavour & texture to the waffles.

I’ve used avo, hemp & coconut bacon for creaminess and crunch. I’ve also dipped waffles in a herby tomato sauce. Both super simple and delicious! Both of these options also help cut through the spiciness/tanginess of the jalapeños.

Enjoy them fresh out of the waffle iron – try not to burn your fingers!

If you don’t manage to eat all your waffles right away, I highly highly recommend toasting them! Waffles (whether sweet or savoury) so get soggy/limp quite easily. You can heat them up again in your waffle maker, BUT the absolute BEST way to get warm is to just pop them in your toaster – after 3+ minutes, they’ll be crispier than before and piping hot again!

IMG_0124IMG_0126IMG_0125IMG_0136IMG_0137IMG_0131IMG_0134IMG_0123IMG_0133Simplicity: 4/5     Deliciousness: 4.5/5     Nutrition: 3/5

Makes 8 medium sized Belgium waffles

Ingredients

  • 4 cups medium cubed potatoes (washed)
  • 1/4 tsp + 1/2 tsp Himalayan pink salt
  • 1/4 cup nutritional yeast
  • 1/2 cup gluten free plain flour (If you’re fine with gluten, just use plain flour)
  • 15 pickled jalapeños rings (small diced)
  • 3 tbsp unsweetened almond milk
  • 1 tbsp pickled jalapeño juice (optional)

Method

  1. In a pot of boiling water, add the potatoes + 1/4 tsp Himalayan pink salt. Stir. Cook on high heat for 10 minutes.
  2. Turn off the heat. Drain the potatoes in a colander.
  3. Rinse off any foam/scum from the pot. Then place the cooked potatoes back into the pot.
  4. Turn on your Belgian waffle maker to mid – high heat.
  5. Add 1/2 tsp Himalayan pink salt, nutritional yeast, gluten free flour and diced pickled jalapeños to the pot. Mix.
  6. Add the remaining ingredients and stir until well combined. The mixture should be sticky (see above photos).
  7. Your Belgian waffle iron should be hot now. If you can adjust the heat, turn the heat of medium (a super hot waffle iron will just burn the bottom of your waffles). Grease your waffle iron (I used unrefined organic coconut oil + paper towel).
  8. Scoop the mixture onto the waffle iron to desired size& thickness. Lightly press down and spread evenly – you do not want to see gaps in the middle! Then close the lid.
  9. Cook until golden brown. Flip them when you’re happy with the colour to crisp them up a little more. Serve immediately for maximum crispiness. ENJOY!

Notes

>> The cooking time until golden brownness will differ slightly depending on the brand, type and heat level of your Belgian waffle maker.

Open the lid and check the colour of the bottom of the waffles after 5 minutes – if not, close the lid and check again every 2 minutes until you’re satisfied.

Use nonstick tongs to check! You don’t want to scratch the coating of your waffle iron.

My waffles are cold, limp and soggy 😦  What can I do?

TOAST THEM!

The absolute BEST way to get the limp waffles hot & crispy again is to pop them in your toaster. After 3+ minutes, they’ll be crispier than before and piping hot again!

Garden Veg Spaghetti (VG)

Pasta is one of those dishes that people avoid because it’s ‘high-carb’, ‘unhealthy’ or ‘will make me fat’.

. . . . . PSHAW!! Please.

The reality is that carbohydrates do not make you fat/unhealthy; the extra oil, salt & animal based products (like meat, cream, cheese e.t.c.) do.

Of course you should eat pasta in moderation (just like how you should eat everything & anything in moderation). Instead of counting calories/carbs/protein/whatever, focus on the vitamins & minerals. Eat wholesome, plant based, nutrient-dense foods.

Now Garden Veg Spaghetti? Not your typical spaghetti with tomato sauce!

It’s a simple spaghetti dish made wholesome & nutritious thanks to the fresh vegetables. Not it mention, it’s also cheap, quick & tasty.

>> Vegan & allium free (no onion, garlic, leek, chives or shallots).

Imagine slurping up the spaghetti + juicy tomatoes + fresh, crunchy veg + nutty, cheesy ‘parmesan’ = 😋 🍝 🌱 🍅

Of course this recipe is totally customisable >> Use vegetables that are most affordable to you (like carrots, peas, capsicum, baby spinach, silverbeet e.t.c.). If you prefer a ‘healthier’ dish, use whole wheat spaghetti. If you can’t consume gluten, use a rice, buckwheat or corn pasta.

Whatever you choose to use, just don’t overcook it (It’s a cardinal sin guys).

img_0019Simplicity: 4/5     Deliciousness: 4/5     Nutrition: 3.5/5

Garden Veg Spaghetti

Serves 2 (or 1 if you’re REALLY hungry haha)

Ingredients

  • 200g spaghetti
  • 6 asparagus stalks (diagonally sliced)
  • 4 large tomatoes
  • 2 button mushrooms (sliced)
  • 6 oakleaf lettuce leaves (halved)
  • 1/2 a zucchini (sliced)
  • a large handful of fresh basil

Method

  1. Place the spaghetti in a pot of boiling water – slightly undercook the spaghetti as it will be cooked in the sauce again later.
  2. As the spaghetti boils, chop 2 tomatoes into large chunks, blend the other two & slice the remaining vegetables (except the basil).
  3. Drain & rinse the spaghetti in cold water.
  4. Heat up a large non-stick frying pan. Add the asparagus and stir. After 1 minute, add a splash of water and cook until tender.
  5. Add the chopped tomato chunks, 1 tbsp olive oil and a sprinkle of salt. Stir and cover the pan with a lid. Cook on low heat.
  6. After 2 minutes, add the blended tomatoes + 1/3 cup water + 1/2 tsp salt & a couple rounds of cracked pepper. Stir and cover with a lid for 3 minutes.
  7. Add the spaghetti and all the remaining veg (lettuce . Mix to combine. Lid again.
  8. After 2 minutes, season with salt to taste. Turn off the heat. Sprinkle with ‘parmesan’ crumb.
  9. ENJOY!


Vegan Parmesan Crumb

Ingredients

  • 1/4 cup raw walnuts
  • 1 tbsp nutritional yeast
  • 1/4 tsp sea salt

Method

  1. Place all the ingredients in a high speed processor/blender
  2. Blitz until well combined into a fine crumb
  3. Store covered in the refrigerator or serve immediately