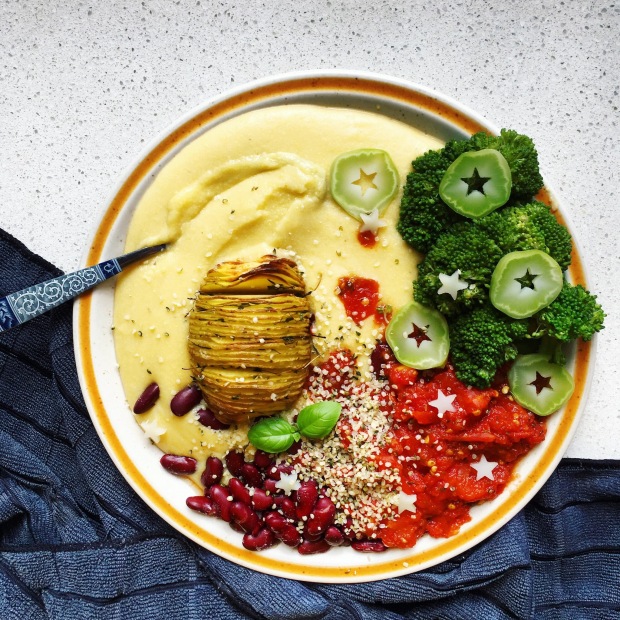
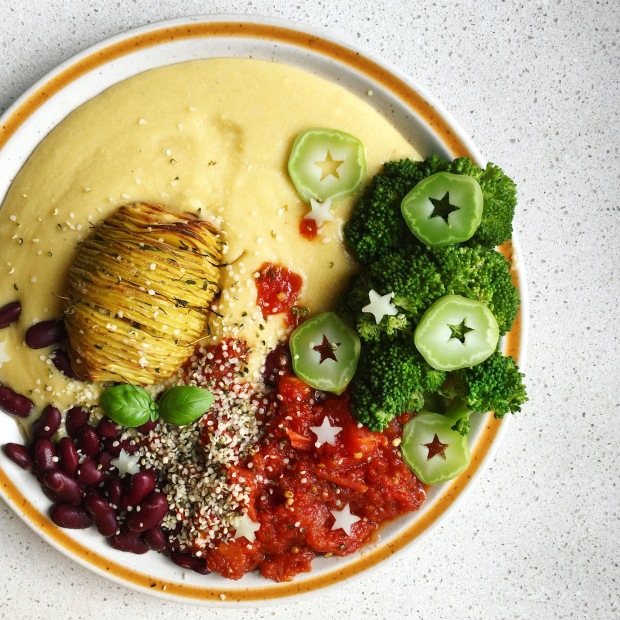
Noochy Polenta Bowls (VG, GF)

Creamy, savoury soft polenta with loads of textures & flavours!

I say ‘bowls’ but it really is served on a plate hahahaha.

First off – What is polenta?

Polenta: A dish of boiled ground cornmeal. It is soft when hot, firm when cooled.

I used to make vegetarian polenta fries that had heaps of salt, cheese & butter. It used to be my signature dish.

But after I chose to be vegan + eat more wholesomely, I’ve been trying to make a vegan version that surpasses the dairy-heavy version – This is it!!

Thanks to the nutritional yeast and miso, the polenta has a unique umani savoury taste that is quite cheesey and nutty.

The polenta’s ‘noochy’ flavour predominantly comes from the nutritional yeast. To be honest, if you are not a fan of the nutritional yeast flavour – you will probably dislike the taste of the polenta in this recipe.

But if you’re a fan of nooch, this is a recipe for you!

My choice of sides/veggies requires a bit of multitasking. I start with the potatoes > sauce > other sides > polenta.

Some of the components of this dish can be made ahead of time. But honestly you can use whatever vegetables or beans you prefer as the polenta pretty much goes with anything.
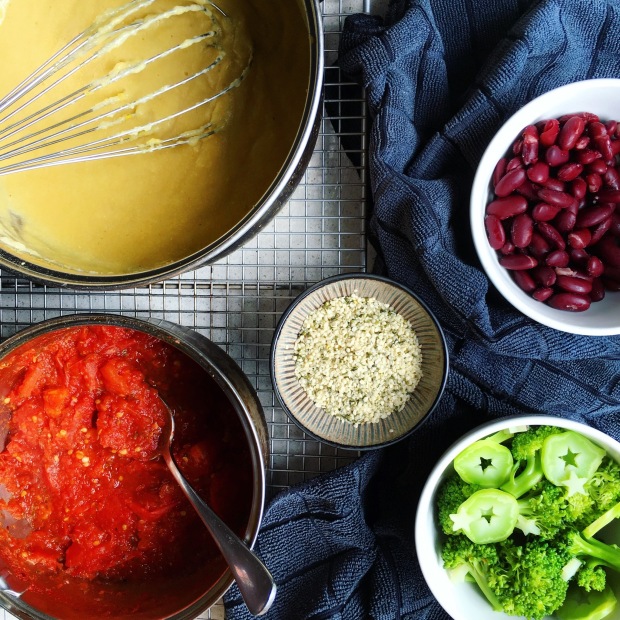
IMG_0039IMG_0040IMG_0041Simplicity: 3/5     Deliciousness: 4/5     Nutrition: 4/5

Serves 2 large portions

Polenta

Ingredients

  • 1/2 cup fine ground polenta (do not use coarse ground!)
  • 1 litre+ boiling hot water
  • 3/4 tsp+ himalayan pink salt
  • 1/4 cup nutritional yeast flakes
  • 1+ tbsp vegan butter
  • 1/4 tsp+ dark miso paste or 1/2 tsp yellow miso paste

Method

1. Fill a medium sized pot with 1L hot water (I like to use a kettle to boil water as it speeds up the boiling process).

2. Slowly pour in the polenta, whisking constantly to prevent lumps. Turn the heat to medium.

3. Cook, whisking consistently, for about 15-20 minutes. Add more water (hot or cold doesn’t matter) when the mixture becomes too thick.

The polenta’s grainy texture will become smooth on the tongue when cooked. Take care during the cooking, as the polenta will bubble and spit (like lava). You do not want to burn yourself.

The consistency you are aiming for is like bottled tomato sauce/passata; smooth and slightly thick. Note that polenta thickens & solidifies as it cools down.

4. Seasoning time. Start with 1 teaspoon of salt and stir.

5. Turn off the heat. Whisk in the nutritional yeast, vegan butter & miso paste until dissolved. Taste. If you prefer it saltier + more buttery, season with more salt, miso paste or vegan butter to taste. Once you’re happy with the seasoning, set the polenta aside. It will thicken as it cools down.


Chunky Spicy Tomato Sauce

Ingredients

  • 5 large juicy tomatoes
  • 1 tsp chilli flakes
  • 1 tsp mixed dried herbs
  • pepper and salt

Method

  1. Chop the tomatoes into chunks. Add 3/5 of the tomatoes into a blender and process until smooth.
  2. Heat up a pot on low. Add the chopped tomato chunks into the pot and stir. After 1 minute, add the chilli flakes and stir. Then, pour the blended tomatoes into the pot. Stir & turn the heat up to medium.
  3. When the sauce starts to boil, add the mixed dried herbs, a couple rounds of cracked black pepper and 1/4 teaspoon of salt. Stir.
  4. Let the sauce bubble away to reduce to a thicker/chunkier consistency. This usually takes 15-20 minutes on medium-high heat. Stir the pot occasionally.
  5. When the sauce has reduced, taste. Add more seasoning to taste. When you’re satisfied with the consistency & flavour, turn off the heat and set the sauce aside.


Sides & Assembling

Ingredients

  • 2 large potatoes
  • 3/4 tbsp olive oil
  • 2 sprigs of thyme
  • 1 whole broccoli
  • 1 can red kidney beans
  • Hemp seeds hearts

Method

1. Preheat oven to 200 degrees Celsius. Line the tray with baking paper.

2. Wash and dry the potatoes.

To make hasselback potatoes: Place the flatter side of the potatoes on the chopping board. Make thin cuts/slices at 3mm intervals about two-thirds of the way down.

If you find it difficult to make the cuts, chopsticks or wooden spoons can aid the process. Place one on either side of the potato while you prep them.

If you can’t be bothered to make hasselback potatoes, just chop them into chunks, toss in olive oil + 1/4 tsp salt and bake until tender & golden.

3. Place the potatoes on the tray. Then, pour & rub the olive all over them. Break the sprigs of thyme into 1 inch pieces and randomly insert between the potato slices.

4. Place in the oven and bake for 45 minutes or until golden brown.

5. While the potatoes cook, prep the remaining sides. Wash & cut the broccoli into easy-to-eat pieces. Drain & rinse the canned beans.

6. Place a pot of boiling water on the stove. Pour the beans in and boil for 2 minutes. Use a strainer ladle to remove them from the water into a bowl.

Then place the broccoli in the pot and boil for 3 – 4 minutes, or until tender. When cooked, remove from the pot into a separate bowl. Set aside.

7. Set out large plates. Scoop on the soft polenta. Then the tomato sauce. Then the broccoli, kidney beans and potato. Finally, sprinkle some hemp seeds for some extra texture (and some extra plant based protein!).

8. ENJOY!!


Potato & Jalapeño Waffles (VG, GF)

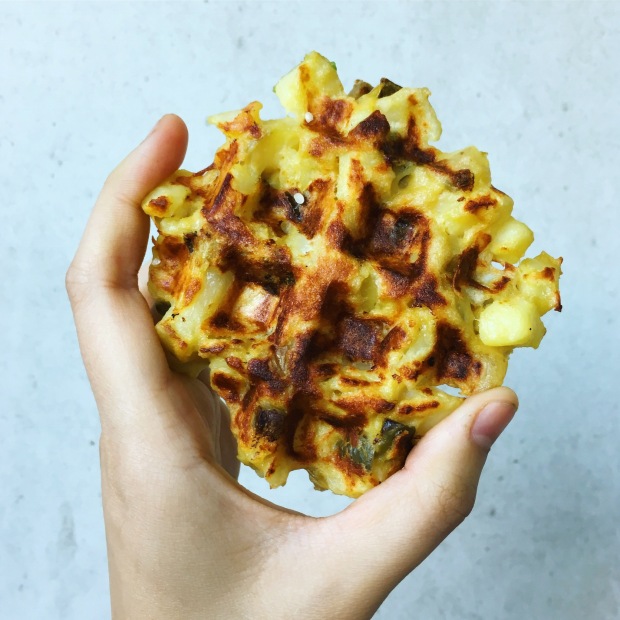
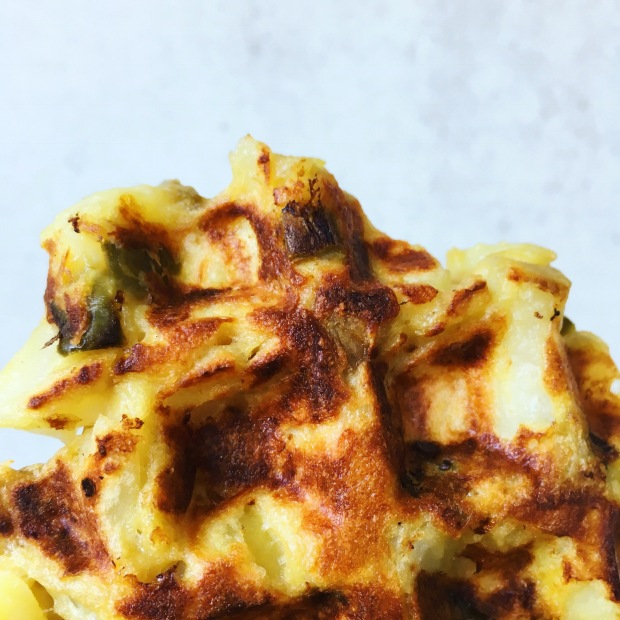
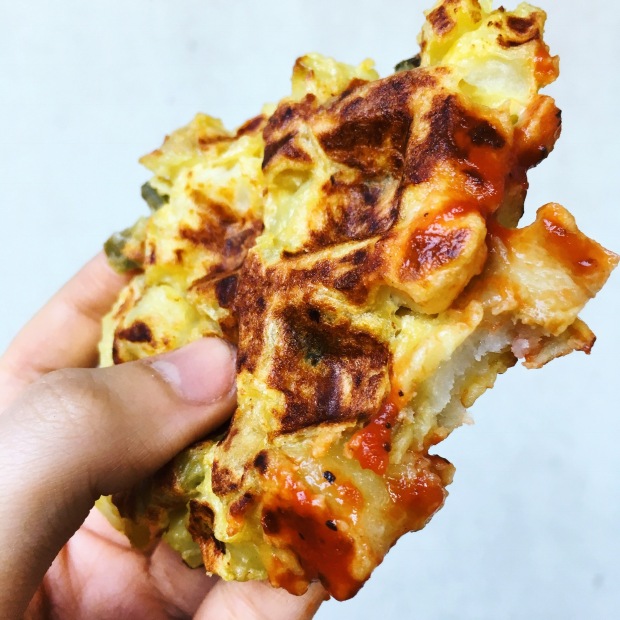
Piping hot, fluffy insides, crispy outside, noochy & savoury with spicy & tangy jalapeño bits…

I know I just said a bunch of adjectives hahaha. Just know that it’s DEEELICIOUS!

I’m absolutely addicted to these! They’re basically hash browns but wafflelised & spicy!

There is no saturated fat or oil used in the waffles themselves. The only oil used is unrefined coconut oil – and that’s for greasing the waffle iron.

The cooking device? I used a non-stick Belgian Waffle maker (Mine is a Cuisinart 4 Slice Belgium Waffle Maker). The deep pockets are perfect for potato waffles that are chunky/have texture!

To adjust the spiciness level, I would suggest using:

zero: 1 cup frozen peas (add these to the boiling potatoes 2 mins before they are cooked)

mild: 8 pickled jalapeños

spicy: 12 pickled jalapeños

extra spicy: 15 pickled jalapeños + 1/2 tbsp pickled jalapeño juice (I love spicy foods so this is the level the recipe is at.)

Toppings and sauce are optional but highly recommended; they will bring some variation of flavour & texture to the waffles.

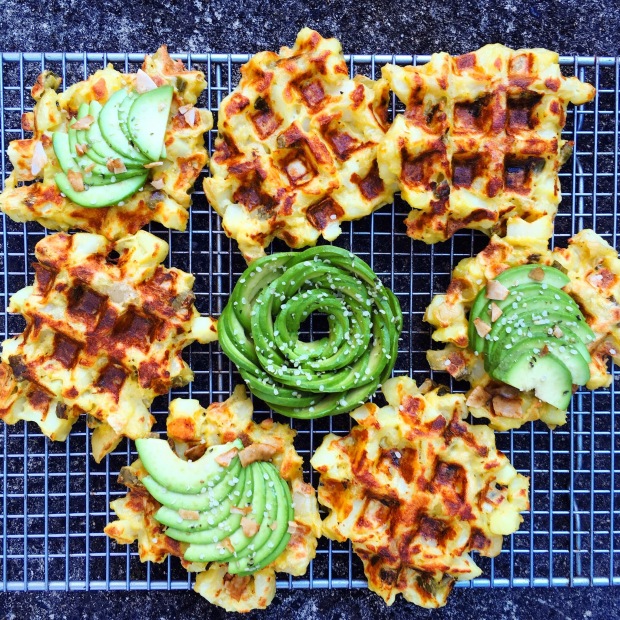
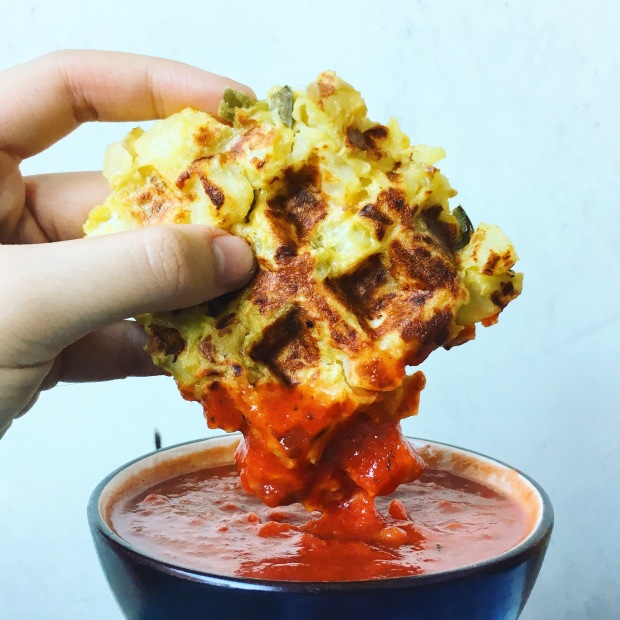
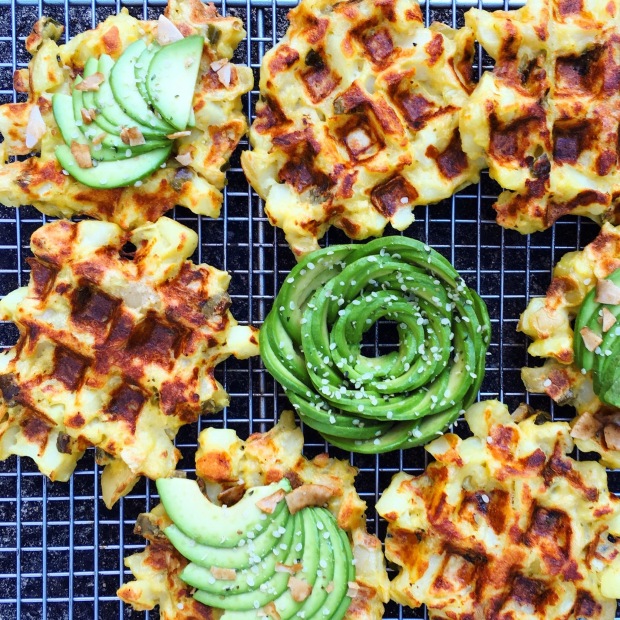
I’ve used avo, hemp & coconut bacon for creaminess and crunch. I’ve also dipped waffles in a herby tomato sauce. Both super simple and delicious! Both of these options also help cut through the spiciness/tanginess of the jalapeños.

Enjoy them fresh out of the waffle iron – try not to burn your fingers!

If you don’t manage to eat all your waffles right away, I highly highly recommend toasting them! Waffles (whether sweet or savoury) so get soggy/limp quite easily. You can heat them up again in your waffle maker, BUT the absolute BEST way to get warm is to just pop them in your toaster – after 3+ minutes, they’ll be crispier than before and piping hot again!

IMG_0124IMG_0126IMG_0125IMG_0136IMG_0137IMG_0131IMG_0134IMG_0123IMG_0133Simplicity: 4/5     Deliciousness: 4.5/5     Nutrition: 3/5

Makes 8 medium sized Belgium waffles

Ingredients

  • 4 cups medium cubed potatoes (washed)
  • 1/4 tsp + 1/2 tsp Himalayan pink salt
  • 1/4 cup nutritional yeast
  • 1/2 cup gluten free plain flour (If you’re fine with gluten, just use plain flour)
  • 15 pickled jalapeños rings (small diced)
  • 3 tbsp unsweetened almond milk
  • 1 tbsp pickled jalapeño juice (optional)

Method

  1. In a pot of boiling water, add the potatoes + 1/4 tsp Himalayan pink salt. Stir. Cook on high heat for 10 minutes.
  2. Turn off the heat. Drain the potatoes in a colander.
  3. Rinse off any foam/scum from the pot. Then place the cooked potatoes back into the pot.
  4. Turn on your Belgian waffle maker to mid – high heat.
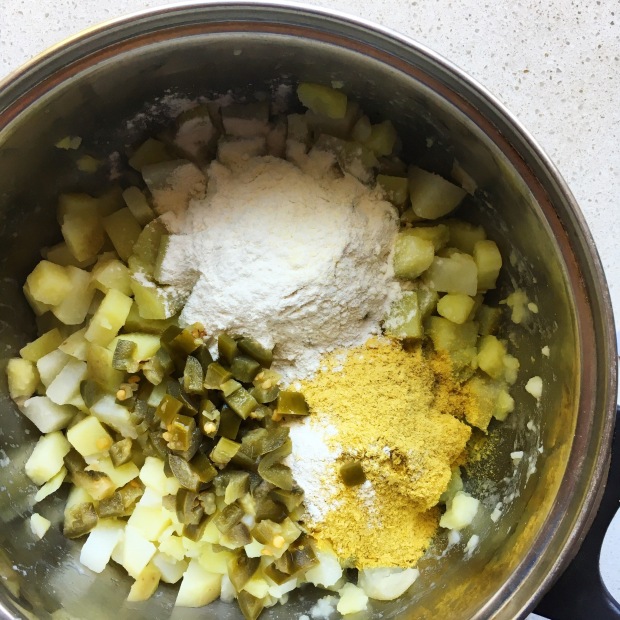
  5. Add 1/2 tsp Himalayan pink salt, nutritional yeast, gluten free flour and diced pickled jalapeños to the pot. Mix.
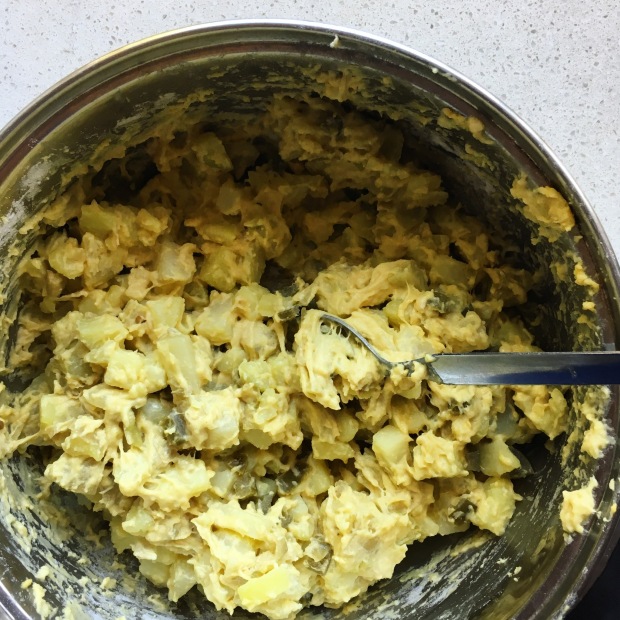
  6. Add the remaining ingredients and stir until well combined. The mixture should be sticky (see above photos).
  7. Your Belgian waffle iron should be hot now. If you can adjust the heat, turn the heat of medium (a super hot waffle iron will just burn the bottom of your waffles). Grease your waffle iron (I used unrefined organic coconut oil + paper towel).
  8. Scoop the mixture onto the waffle iron to desired size& thickness. Lightly press down and spread evenly – you do not want to see gaps in the middle! Then close the lid.
  9. Cook until golden brown. Flip them when you’re happy with the colour to crisp them up a little more. Serve immediately for maximum crispiness. ENJOY!

Notes

>> The cooking time until golden brownness will differ slightly depending on the brand, type and heat level of your Belgian waffle maker.

Open the lid and check the colour of the bottom of the waffles after 5 minutes – if not, close the lid and check again every 2 minutes until you’re satisfied.

Use nonstick tongs to check! You don’t want to scratch the coating of your waffle iron.

My waffles are cold, limp and soggy 😦  What can I do?

TOAST THEM!

The absolute BEST way to get the limp waffles hot & crispy again is to pop them in your toaster. After 3+ minutes, they’ll be crispier than before and piping hot again!

Garden Veg Spaghetti (VG)

Pasta is one of those dishes that people avoid because it’s ‘high-carb’, ‘unhealthy’ or ‘will make me fat’.

. . . . . PSHAW!! Please.

The reality is that carbohydrates do not make you fat/unhealthy; the extra oil, salt & animal based products (like meat, cream, cheese e.t.c.) do.

Of course you should eat pasta in moderation (just like how you should eat everything & anything in moderation). Instead of counting calories/carbs/protein/whatever, focus on the vitamins & minerals. Eat wholesome, plant based, nutrient-dense foods.

Now Garden Veg Spaghetti? Not your typical spaghetti with tomato sauce!

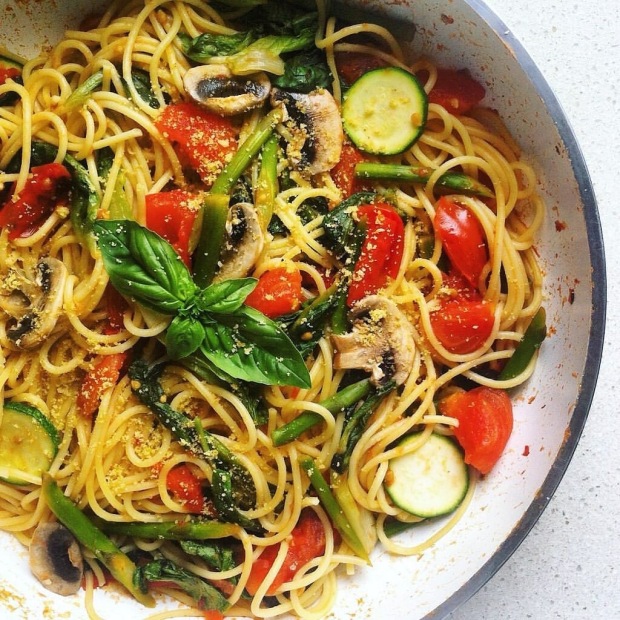
It’s a simple spaghetti dish made wholesome & nutritious thanks to the fresh vegetables. Not it mention, it’s also cheap, quick & tasty.

>> Vegan & allium free (no onion, garlic, leek, chives or shallots).

Imagine slurping up the spaghetti + juicy tomatoes + fresh, crunchy veg + nutty, cheesy ‘parmesan’ = 😋 🍝 🌱 🍅

Of course this recipe is totally customisable >> Use vegetables that are most affordable to you (like carrots, peas, capsicum, baby spinach, silverbeet e.t.c.). If you prefer a ‘healthier’ dish, use whole wheat spaghetti. If you can’t consume gluten, use a rice, buckwheat or corn pasta.

Whatever you choose to use, just don’t overcook it (It’s a cardinal sin guys).

img_0019Simplicity: 4/5     Deliciousness: 4/5     Nutrition: 3.5/5

Garden Veg Spaghetti

Serves 2 (or 1 if you’re REALLY hungry haha)

Ingredients

  • 200g spaghetti
  • 6 asparagus stalks (diagonally sliced)
  • 4 large tomatoes
  • 2 button mushrooms (sliced)
  • 6 oakleaf lettuce leaves (halved)
  • 1/2 a zucchini (sliced)
  • a large handful of fresh basil

Method

  1. Place the spaghetti in a pot of boiling water – slightly undercook the spaghetti as it will be cooked in the sauce again later.
  2. As the spaghetti boils, chop 2 tomatoes into large chunks, blend the other two & slice the remaining vegetables (except the basil).
  3. Drain & rinse the spaghetti in cold water.
  4. Heat up a large non-stick frying pan. Add the asparagus and stir. After 1 minute, add a splash of water and cook until tender.
  5. Add the chopped tomato chunks, 1 tbsp olive oil and a sprinkle of salt. Stir and cover the pan with a lid. Cook on low heat.
  6. After 2 minutes, add the blended tomatoes + 1/3 cup water + 1/2 tsp salt & a couple rounds of cracked pepper. Stir and cover with a lid for 3 minutes.
  7. Add the spaghetti and all the remaining veg (lettuce . Mix to combine. Lid again.
  8. After 2 minutes, season with salt to taste. Turn off the heat. Sprinkle with ‘parmesan’ crumb.
  9. ENJOY!


Vegan Parmesan Crumb

Ingredients

  • 1/4 cup raw walnuts
  • 1 tbsp nutritional yeast
  • 1/4 tsp sea salt

Method

  1. Place all the ingredients in a high speed processor/blender
  2. Blitz until well combined into a fine crumb
  3. Store covered in the refrigerator or serve immediately

Vegan Quiche Puff Pastry Rolls (VG)

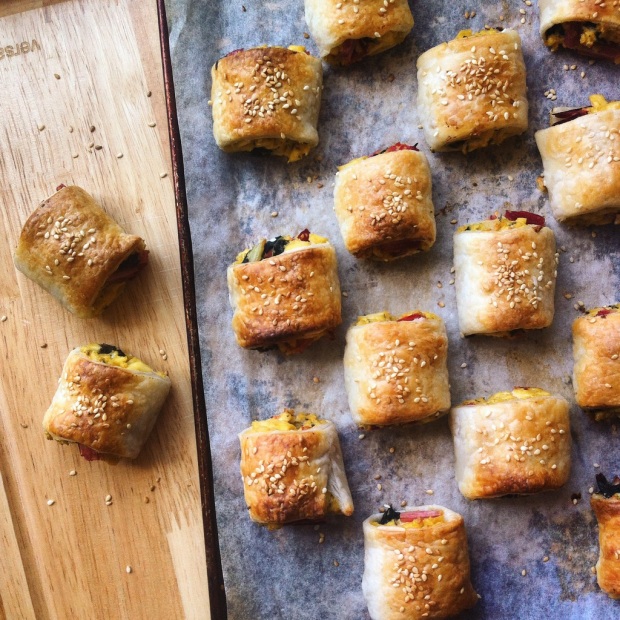
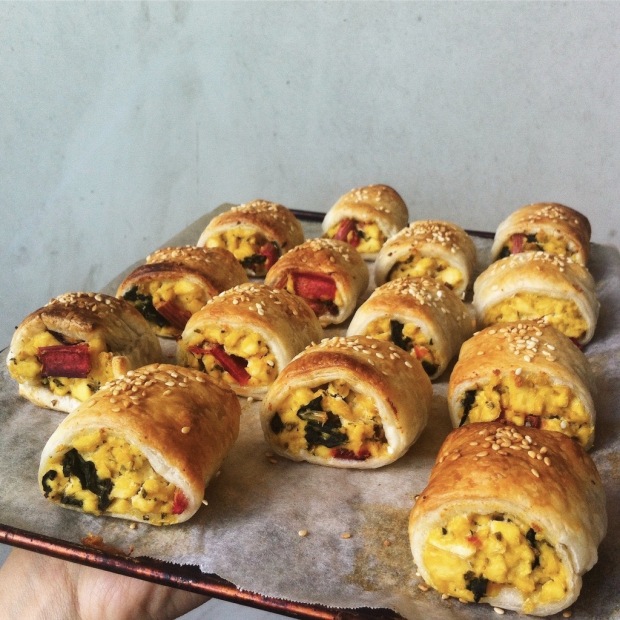
Vegan puff pastry rolls stuffed with noochy tofu. tomato & silver beet 🌿✨
the filling consists of crumbled firm tofu, fresh tomato, wilted silver beet, nutritional yeast, almond milk, dried mixed herbs, salt & pepper >> crispy, flaky, creamy & cheesy 👅💦
These unexpectedly ended up tasting like a quiche (weird right?) ~ hence the name. 😉

Btw these will only take 30 minutes (15 min prep, 15 min baking time)!

So if you’re heading to a party or just feel like a tasty savoury snack, you’ll be able to enjoy these in no time!

If you’re not sure what silver beet is, it is also called swiss chard or spinach beet. It’s become one of my favourite vegetables to eat as it is soooo easy to cook & naturally delicious. Plus its stems also comes in various colours: white, yellow, red & pink (it’s a rainbow!). 🌈

A vegan reimagining of a quiche + the classic vegetarian combination of feta & spinach. 🙌🏼

Truly simple and delicious ~ 💛

photo-1-3photo-2-2img_8086Simplicity: 4.5/5     Deliciousness: 4/5     Nutrition: 3/5

Ingredients

  • 300g firm tofu
  • 6 large stalks of silver beet
  • 4 tbsp nutritional yeast
  • 1/4 cup plant based milk
  • 2 tsp dried mixed herbs
  • 1 large tomato
  • salt & pepper for seasoning
  • 2 sheets of frozen vegan puff pastry
  • white sesame seeds (for sprinkling)

Method

  1. Preheat oven to 225 degrees Celsius. Line two trays with baking paper.
  2. Wash the tofu and place in a large mixing bowl. Then, using your hands, crumble the tofu. Set aside.
  3. Wash tomato. Roughly dice into small-medium sized pieces. Set aside.
  4. Wash the silver beet. Then roughly dice the stems of the silver beet into small square shapes. The leaves can be chopped into larger pieces.
  5. Heat up a pan. Add half of the silver beet you just chopped. Stir. When you start to see the silver beet softening, add a splash of water and cover with a lid. The stems of the silver beet should be tender but still have a ‘bite’. Remove from the pan and add to the tofu. Repeat this step for the remaining silver beet.
  6. Mix the silver beet and tofu. Add the nutritional yeast, plant based milk, herbs & tomato. Mix. Add salt and pepper to taste (don’t worry – tofu can be eaten raw).
  7. Slice the two sheets of vegan puff pastry in half.
  8. Scoop the filling in the middle of the pastry. Gently but firmly roll to form a long sausage-like shape. Slice the roll into 5-6 smaller pieces. Repeat for remaining filling.
  9. Place the rolls onto the trays – leave space between so that they do not touch (the pastry won’t cook evenly if they do touch). Sprinkle white sesame seeds on the top.
  10. Bake for 15 minutes until golden brown.
  11. ENJOY! 😊

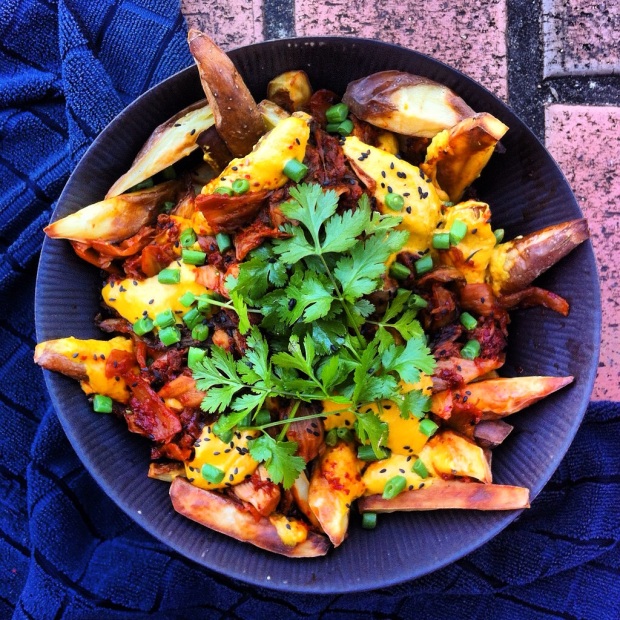
Vegan Kimchi Fries (VG, GF)

First, homemade vegan kimchi, kimchi pancakes now kimchi fries. I’m cray cray for kimchi ahahaha 😆

So I don’t really have a solid idea of how kimchi fries are supposed to taste but to me, this is deeelish 😜  Admittedly I’ve heard of kimchi fries plenty of times before but have never had the chance to try it (because of all the animal products they use) 😓

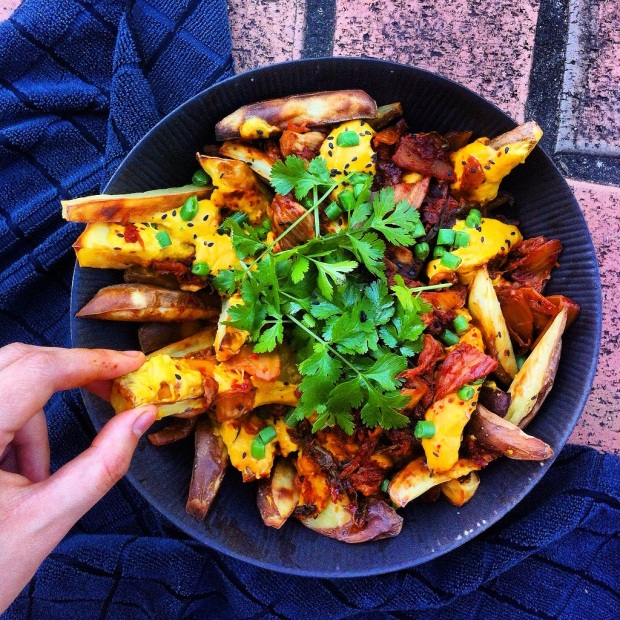
Crispy fries + stretchy cheese + spicy & tangy kimchi + citrusy coriander + juicy green beans = foooodgasm ❤️ 💛 💚

Oh and these kimchi fries aren’t just vegan ~ They’re also gluten free, allium free, oil free and refined sugar free!! I used my Cruelty Free Kimchi (spicy & ultra tangy) for this bowl of deliciousness.

At first, these kimchi fries taste and feel like an odd combination.. but strangely it becomes more addictive & tasty as I eat! Especially the ‘cheese’ – it’s got a unique savoury taste and a ooey, gooey, stretchy texture. I was inspired by Sam’s Melty Stretchy Gooey Vegan Nacho Cheese and adapted it to suit my preferences (allium free) & the ingredients available to me. ✌🏼

Understandably if you’re not a fan of nut based cheeses, the texture of tapioca or just don’t want to gather all the ingredients, feel free to buy vegan cheeses. I recommend using a vegan cheese that is meltable.

Also if you’re not a fan of potatoes that have been baked without oil, I would toss the sliced potatoes in about 2 tbsp of olive oil before baking them. Customise the recipe to your preferences and ingredients! 😏

Make of bowl of these vegan kimchi fries to share (or for yourself because #foodlife haha) 1f604.png 1f604.png

photophoto-2Simplicity: 3.5/5     Deliciousness: 3.5/5     Nutrition: 2.5/5

Makes 3 servings (approx.)

Ingredients

Fries

  • 6 large potatoes
  • 1.5 tsp salt

Caramelised Kimchi

  • 3/4 cup kimchi
  • 1½ tbsp coconut sugar
  • 1 tsp tamari
  • 1/2 tbsp apple cider vinegar (optional – do not use if the kimchi is already tangy/sour enough)
  • 3 green beans

Ooey Gooey Vegan Cheese

  • ¼ cup raw cashews (soaked in cold water overnight)
  • 1 cup hot water
  • 3 tbsp tapioca starch (also known as Tapioca Flour)
  • 3 tbsp nutritional yeast
  • 1 tbsp lemon juice or ½ tbsp apple cider vinegar
  • 1 tsp pure maple syrup
  • 1 tsp paprika
  • 1 tsp salt
  • ½ tsp vegan dark miso paste or 1 tsp vegan yellow miso paste
  • ¼ tsp turmeric


Method

Fries

  1. Heat up a large pot of water until almost boiling.
  2. Clean and remove any eyes from the potatoes. Slice into fairly thick fries. Place in the pot. Cover pot with a lid and leave to boil on high heat for 10 minutes.
  3. Preheat the oven to 200 degrees Celsius. Line 2 baking trays with baking paper and set aside.
  4. When the potatoes have boiled for 10 minutes, carefully drain them into a colander. let them dry and cool down before placing them onto the trays.
  5. Lay them out uniformly on the baking trays with enough space between each slice so they aren’t touching. Season by sprinkling the salt all over.
  6. Bake for 30-40 minutes or until golden & crispy.

Caramelised Kimchi

  1. Wash the green beans and dice. Roughly chop the kimchi into bite sized pieces.
  2. Heat up a non-stick pan. When the pan is hot, add the diced green beans. Stir.
  3. After a minute, add about 1 tbsp of water. Cover the pan with a lid and leave to steam-fry until all the water has evaporated. Remove the green beans from the pan and set aside.
  4. In the same pan, add the kimchi to the pan. Stir.
  5. After a minute, add the tamari and sprinkle the coconut sugar all over the kimchi. Stir. Cook for another 3 minutes. The kimchi should now have a darker, sticky coating.
  6. Turn off the heat and set aside.

Ooey Gooey Vegan Cheese

  1. Drain the cashews that have been soaking since last night. Add all the ingredients into a high speed blender. Blend for at least one minute – until smooth. The mixture will be watery. If you don’t have a high speed blender, just blend & pour the mixture through a fine sieve/strainer/cheese cloth before heating. This will make sure you achieve a smooth (not grainy) texture.
  2. Pour into a small non-stick pot and heat over medium heat. Stir constantly with a small spatula.
  3. As you stir, the mixture will start to clump (do not panic & keep stirring – this is simply the tapioca starch starting to bind everything together). The mixture will stop being so lumpy and suddenly come together into one mass of ooey gooeyness. This will take about 5 minutes. Continue to cook & stir for an additional 2 minutes to ensure the ‘cheese’ is firm and cooked.
  4. I like a softer and stretchier ‘cheese’ texture so I add about ½ tbsp of water at a time to it and stir to combine (I keep doing this until I am happy with the consistency).
  5. Turn off the heat. Start compiling your kimchi fries: a layer of potatoes, dollops of ooey gooey vegan cheese, scoops of caramelised kimchi and repeat. Top with green beans, fresh coriander and sesame.
  6. ENJOY!! 😊